All posts by Dave Corboy

Laser Turret

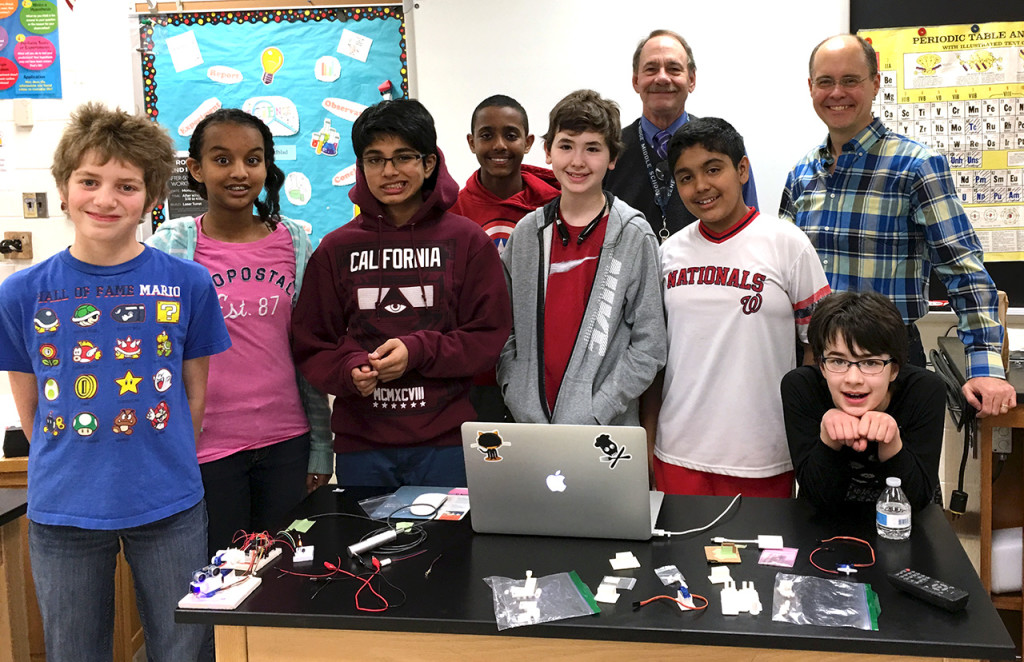
Seneca Ridge Middle School students at the workshop

The Laser Turret project was built for a STEM technology workshop that I organized at the local middle school. “Laser Turret” was the project that was chosen among several options I offered at a talk on computer engineering and technology careers.

Weapons System Design

In order to be cool enough to impress kids, I wanted the turret to have motorized 2-axis aiming to pan and tilt the laser and fully automated aiming and firing. In order to designate its own targets, the turret would need some kind of sonar/radar target scanning and, of course, a working laser, lights and sound.

I wanted to show that we could build this new idea from scratch, so the whole thing would start with an original design that would be 3D printed to make the turret parts.

Components
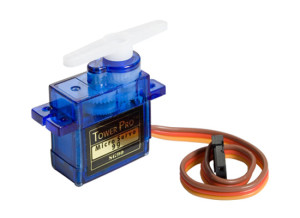
Nine-gram micro servo

Before we could design the turret itself, we needed to choose the electronic and mechanical components that would define its operation. We wanted to try to stick to as simple a design as possible, so that meant thinking small.

The tiny 9g micro-servo is about as small and simple as mechanical output gets! 180-degrees of roboty sound and motion driven directly by one 5v pin.
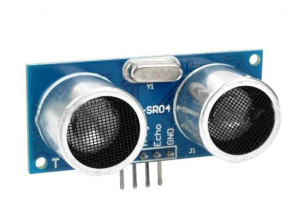
HR-SR04 Ultrasonic Sensor

To let the turret scan its environment for enemies, we imagined a scanning sonar solution based on the HR-SR04 ultrasonic sensor. This common starter-kit component is made to sense distance using high-frequency sound echos, but I saw no reason why we couldn’t spin it around and “look” in all directions.
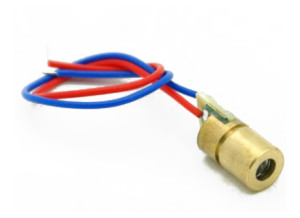
Five milliwatt laser diode

The laser itself is a genuine 5-milliwatt 650-nanometer laser, which is a fun way to not have to say that’s it’s a 35-cent laser-pointer diode.

So that’s one servo for pan, one servo for tilt and a third to rotate our scanning sonar back and forth. Add in one ultrasonic sensor, one serious-looking laser and a handful of variously-colored LEDs and wires and we’re still under $10 so far.

The turret still needs brains, a control system to process the input signals, select targets, align the laser and send those photons down range. A compact weapons package like ours deserves a sleek piece of miniaturized computing power.
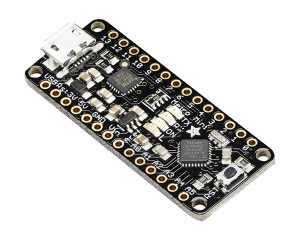
Adafruit Metro MiniThe AdaFruit Metro Mini answers the call in  black stealth pajamas. The Metro Mini packs a 16Mhz ATmega328 processor, serial communication and 20 GPIO pins into  its thumb-sized package and looks super-cool doing it.

Design & Modeling

Rather than using an existing design, we had decided to create our turret from scratch. The first step was to decide how the turret would work mechanically, where the servos would go and how they would move the parts of the turret.

Here’s what we came up with.
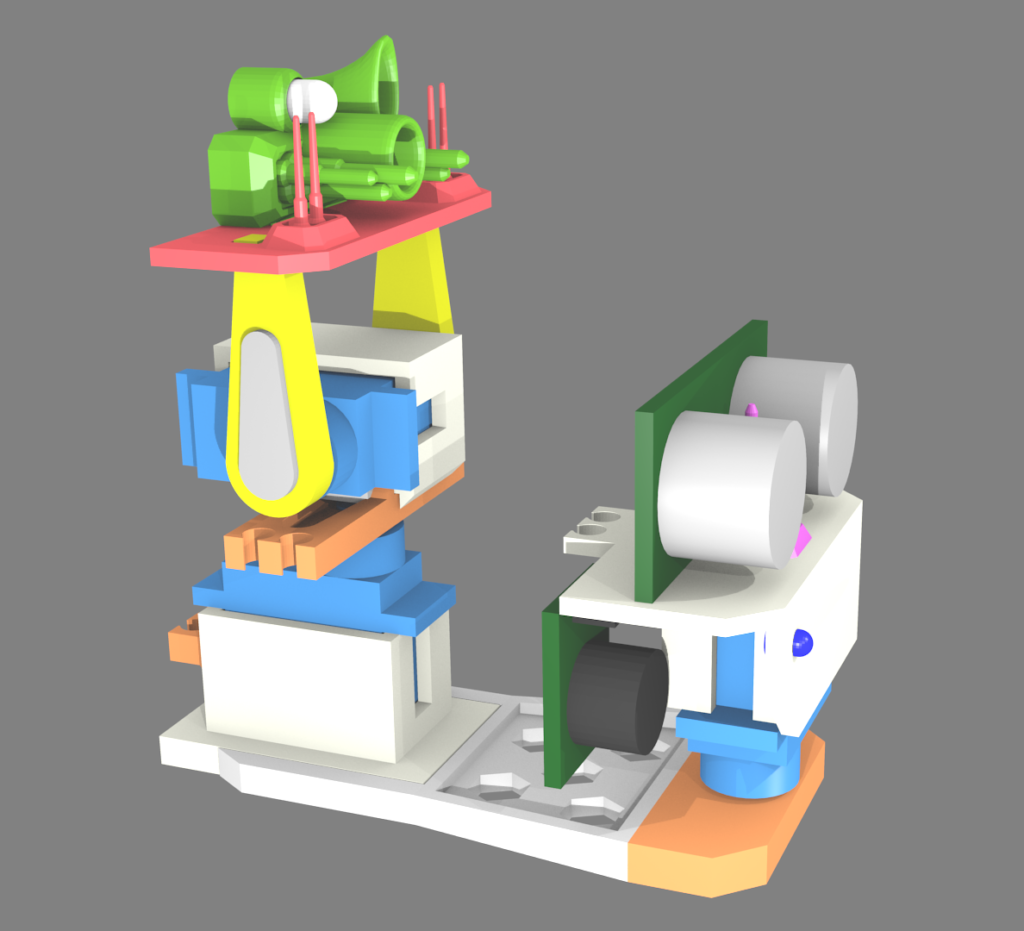
Finished turret model

We threw away a number of more complex ideas and settled on a simple design where the laser can be stowed out of view and then pop up into pan & tilt action when an enemy is detected.
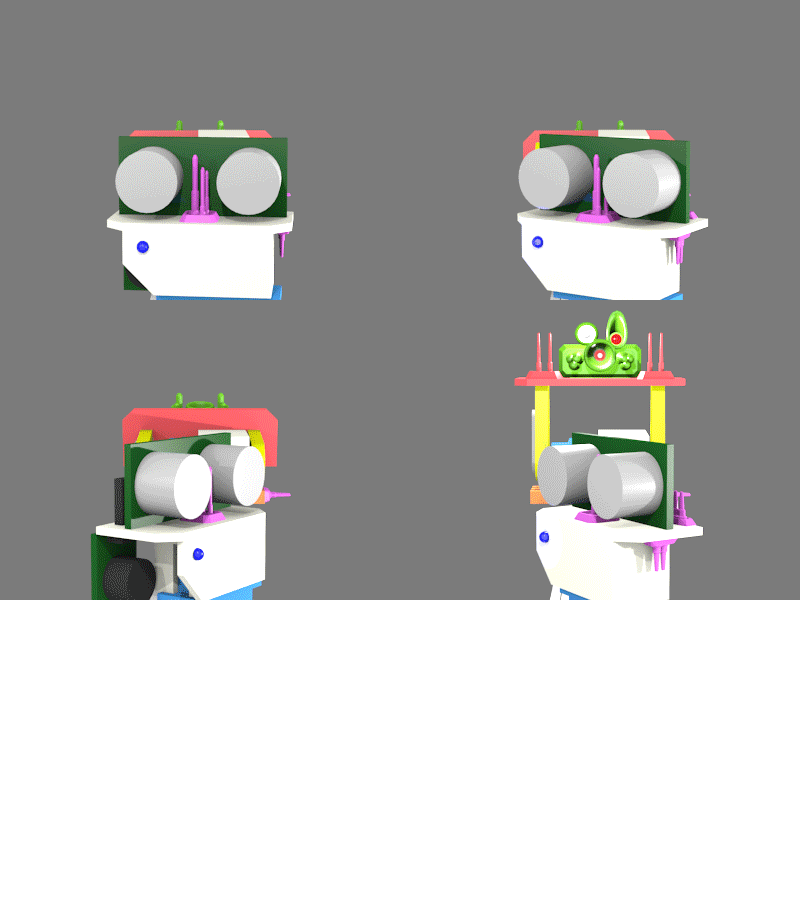
Turret Front View
Turret Front View

From the side, you can see the rotating sonar platform as well as the pan and tilt laser weapons platform.
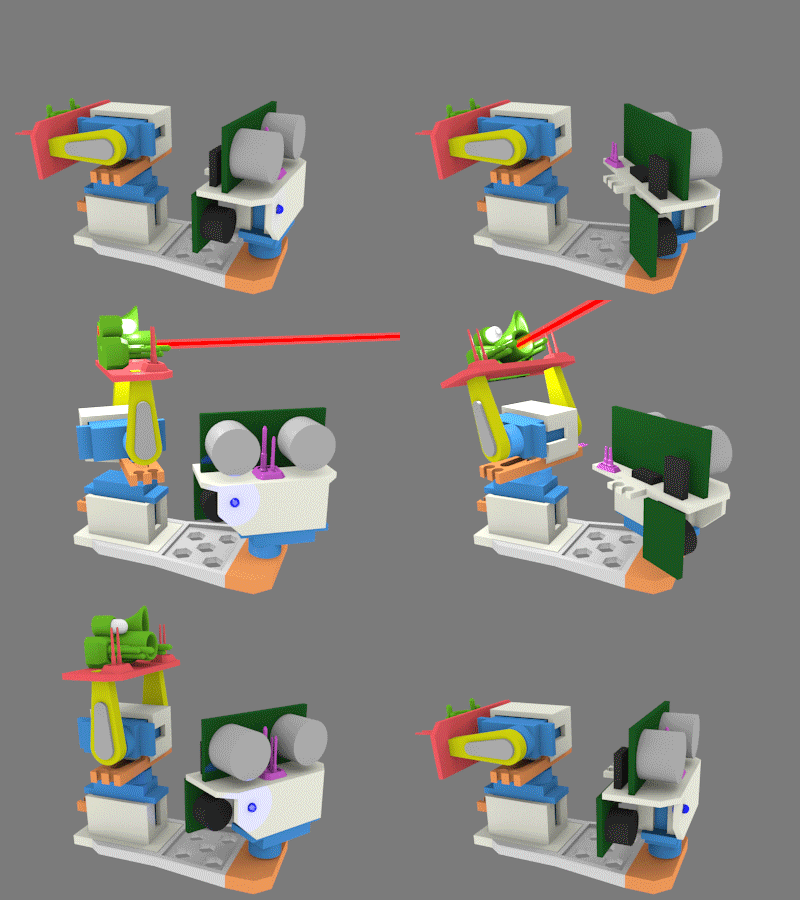
Turret Side View
Turret Side View

The model was built in Blender and refined with several tests using Ken’s 3D printer to ensure the eventual fit of the final parts.
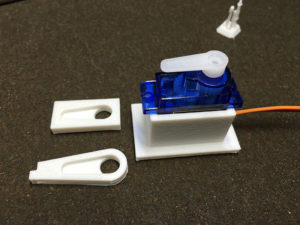
Test parts to refine fit

Here’s one of the test prints that shows a servo inside an enclosure that served as the model for all the servo housings. The loose square piece was used to test the fit of the servo arm, mounted on the servo. Below the test piece, you can see the final printed arm that was made from the test part’s geometry.
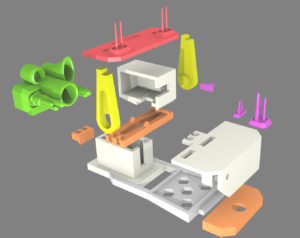
Exploded parts view
Exploded parts view

The design allowed for certain pieces to lock together and for others to rotate against each other.  You can see some of the types of connections in this exploded view.

The weapons array consisted of a large “flash” LED to enhance the firing effect as well as a red LED that would mimic the laser without the eye-damaging laser light. The laser itself would only be active for less than a tenth of a second, but it was enough to mark you with a red laser dot if you were “hit”.

Once complete, the laser turret model was virtually disassembled and the pieces were aligned for the 3D printing of the parts.
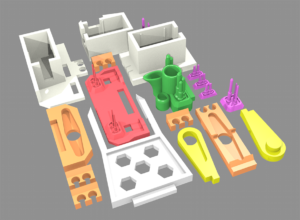
3D printing layout
3D printing layout

Programming

Programming the turret consisted of three simple, specialized components. In addition to a master command program, some additional code went into managing the sonar system and the laser platform sub-components.
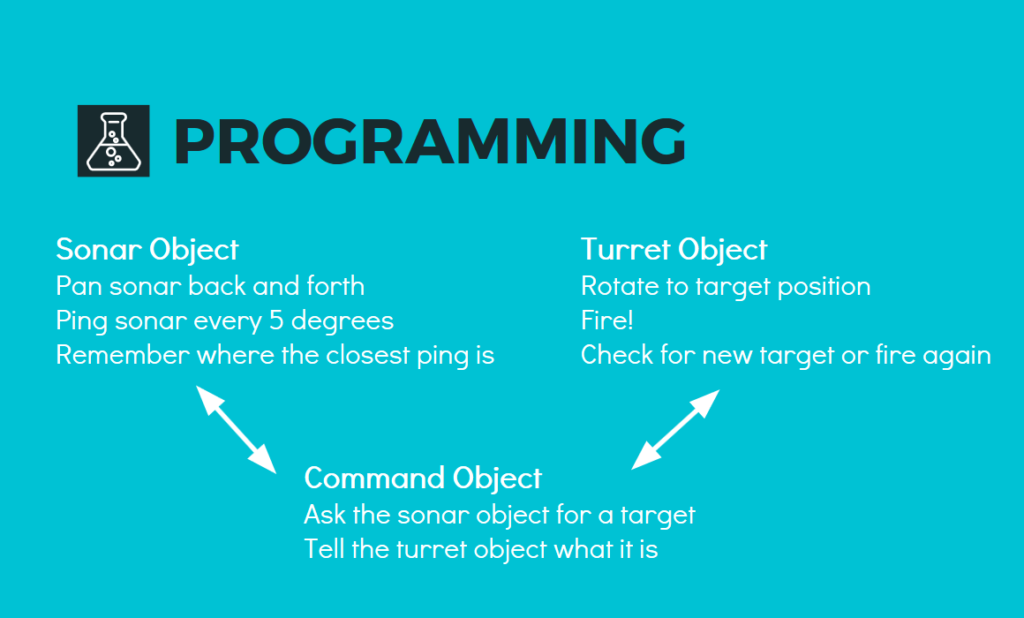
Programming model
Turret system component model

By delegating target-acquisition and firing to the sub-components, the command program became very simple, only needing to ask the sonar for a target and then handing it off to the firing platform.

Pinout
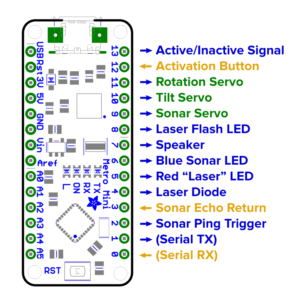
Connections between the turret and the microprocessor

Once the physical components and the programming of the turret were defined, it was time to look at the wiring for the AdaFruit Metro Mini electronic control system.  For the programming to work, all the servos, LEDs  and other components needed a connection to the microprocessor.

I also created a small operator panel with an activation button and two small status LEDs. This diagram shows how it all worked out.

Assembly
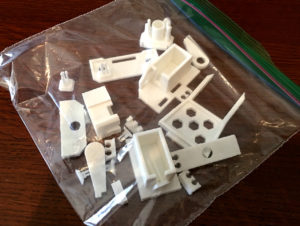
3D-printen turret parts
3D-printed turret parts

The turret came back from the printer as a baggy full of loose parts. Shout out again to Ken and his Flashforge Dreamer. Our next step was sorting through all the parts and beginning the assembly.
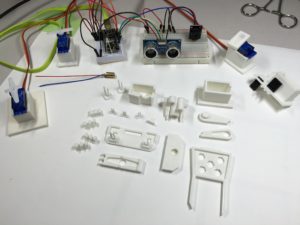
Printed parts and components

Here’s all of our turret parts arranged for assembly.

All we needed was an assembly crew.
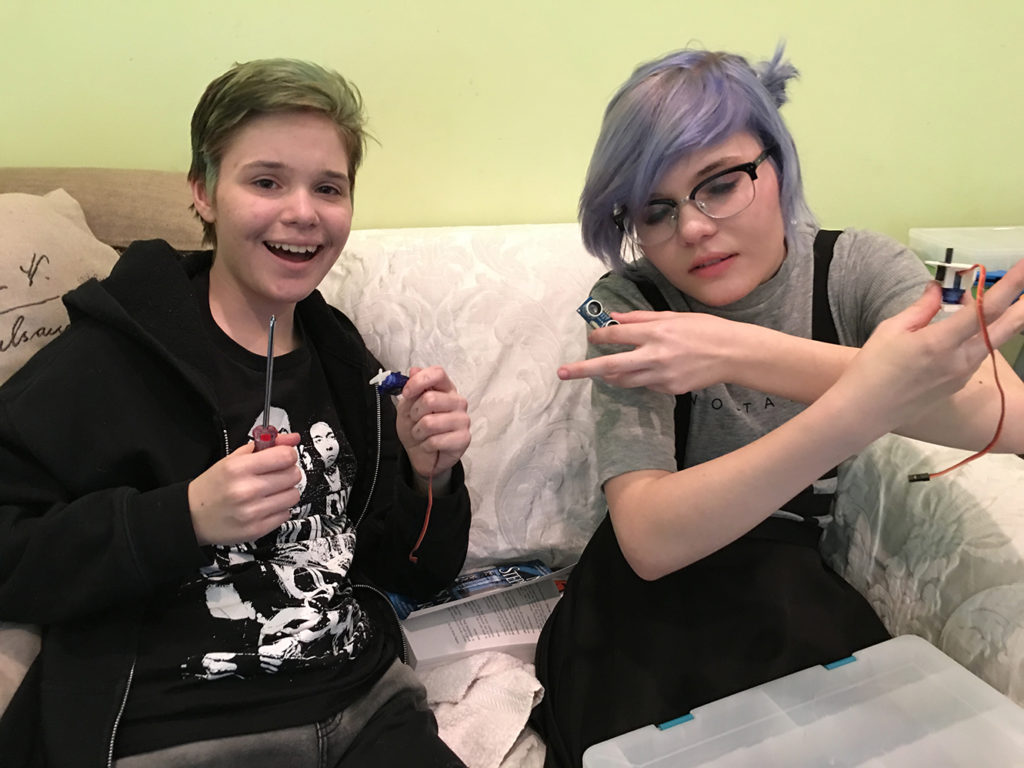
Turret assembly crew

And here they are, my daughters Maddie and Cas, who were kind enough (at least for a little while) to put up with a lot of fidgeting with tiny wires.
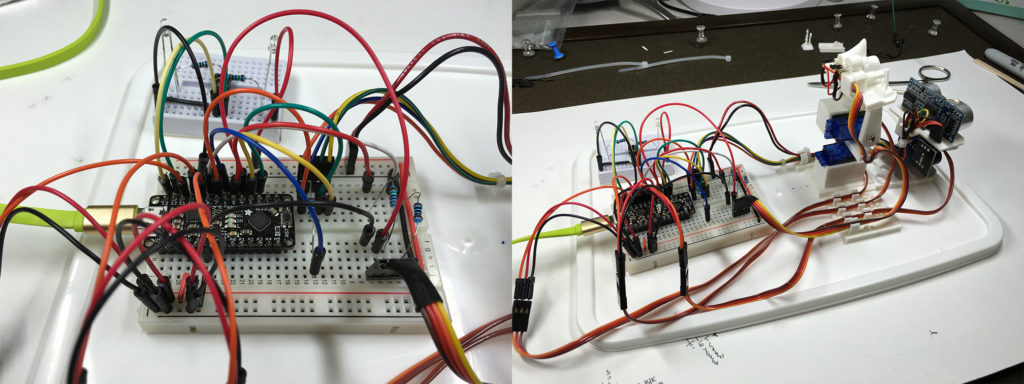
Turret wiring harness (28 AWG)

These two images show the connections to the Metro Mini and the completed turret. Even with 28-guage wire, the wire (and its weight/tension) contributed significantly negatively to optimal turret operation. In other words, maybe I should have used even smaller wires… or better yet, a BIGGER turret!

Next time, perhaps.

Testing & Demonstration
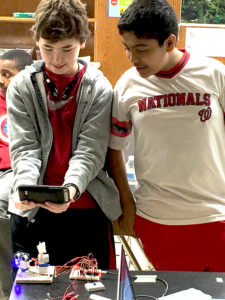
Live-fire testing in a classroom environment

Cas and Maddie helped me test the turret in a large basement room. A few tweaks to the programming was all that was needed to start tracking and firing at the girls as they moved around the room.

At the middle school, the kids enjoyed trying to evade the automated firing system, but were quick to exploit the limitations of the platform, such as having everyone attack at once. Sun Tzu might be proud, Grand Moff Tarkin, maybe not so much.

STEM Workshops

Thanks for attending my STEM presentation!

We talked about the many exciting and fun opportunities that there are in science and engineering careers and we saw how much can be done with with a little understanding how to connect electronic parts together and by using programming no more complex than seen in Hour of Code.

While technology devices are shrinking, the jobs in computers, engineering and science are growing at an astounding rate.
It’s truly an exciting time and careers like those we’ve talked about will let you participate in and shape the next generation of the technology people use every day.

Below are some additional resources that you may be interested in.

After-School Workshop Interests Form

If you’d like to attend the after-school workshop, I like to know what you’d find most interesting. Please click on the form link below to give me your thoughts.

After-School Workshop Form

More About the uArm Robot

The robotic tic-tac-toe player is an ongoing project and you can follow all the progress here.

This short video gives a good overview of the vision system.

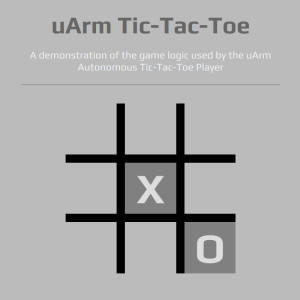
You can play tic-tac-toe against the actual game algorithm programmed into the robot by clicking here, or on the image below.

Challenge the Robot
Challenge the Robot now on the Web

If you are a school administrator or a parent and are interested in more information, please email me.

Robot Tic-Tac-Toe

Robot-in-Training
Robot-in-Training

 uArm Metal Autonomous Tic-Tac-Toe Robot

Welcome to the project page for the Autonomous Tic-Tac-Toe Robot. I’ll update this page periodically with any new progress if you want to follow along.

Goals

The overarching goal for the robot is to play fully autonomously, like a human. This defines five major components I decided were needed to fulfill that goal.

  • Understand the Game
    The robot must understand how the game is played and have some sense of a strategy for winning.
  • Sense the Board
    The robot must be able to interpret the moves that the player makes and understand the positions of  the pieces on the board.
  • Move the Pieces
    To robot must make its own moves at the appropriate times, using whichever marker has been assigned.
  • Play Autonomously
    All the programming must reside within the robot itself and it should play without any connected computer or external signal.
  • Convey Emotion
    This is a “stretch goal” to see if the robot can convey emotion to the player, based on the status of the game.

About the Robot Arm

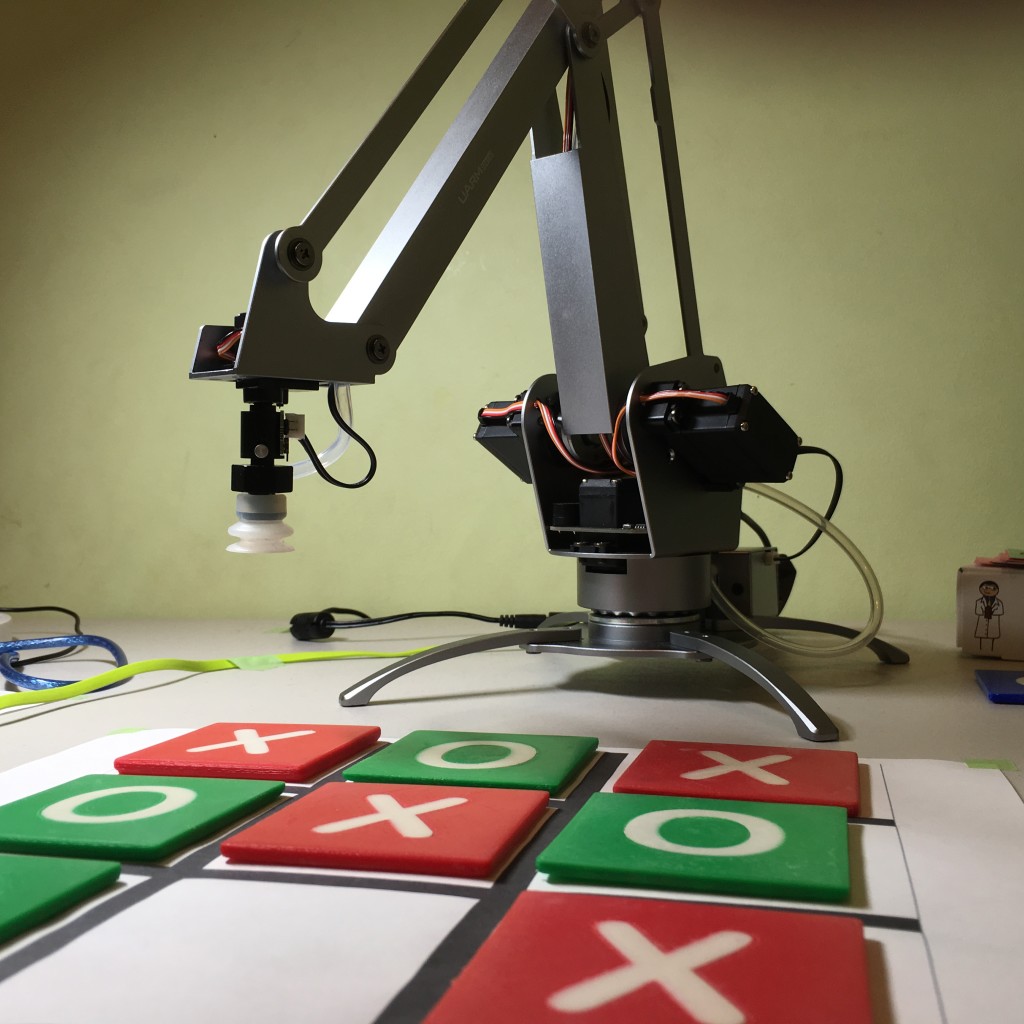
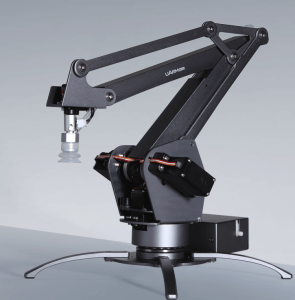
The robot arm is a uArm Metal, made by UFactory. It was created initially as part of a Kickstarter campaign and is now in production.

The uArm Metal
The uArm Metal

The uArm is a 4-axis robotic arm with three degrees of freedom as well as a hand-rotation axis. It’s based on a design for an industrial pallet-loader and is thus best suited for positioning and stacking items in a 180-degree operating area.

The uArm is controlled by an on-board Arduino microprocessor and is fully open source.

Understanding the Game of Tic-Tac-Toe

There are lots of resources on the web that will tell you how to play tic-tac-toe and there are many ways to teach a computer how to implement game strategy. For reasons related to the memory available on the microprocessor, I wrote an algorithm based on logical human strategies such as, “move to an open corner such that a block does not result in two in-a-row for the opponent.” The computer must understand both how to translate that strategy into an appropriate move and also when to apply that particular strategy.

The initial version of the strategy algorithm worked so well that the robot was unbeatable and therefore, noted my daughter Cassie, no fun at all.

Challenge the Robot
Challenge the Robot now on the Web

A final version of the robot game-logic incorporates three difficulty levels based on characters I hope to explore further in the emotion section.

You can play tic-tac-toe against the actual game algorithm programmed into the robot by clicking here, or on the image of the game board.

Sensing the Board

Computer vision is a computationally-expensive thing and beyond the reach of most small micro-controllers. The robot solves this problem with the Pixy (CMUcam5) from Charmed Labs that employs a dedicated on-board processor for simple object recognition.

This short video gives a good overview of the vision system.

The Pixy allowed me, the programmer, access to a much simpler stream of information where blobs of different color are represented as screen rectangles. This helps a lot.

Moving the Pieces

Moving the pieces was pretty straightforward using the built-in programming of the uArm, but I thought it could be better. I made a number of improvements to the way the arm worked and contributed those changes back to the open-source project where they’re now part of the arm’s programming. Pretty cool!

The video below also shows an example of common engineering math. You’ll find that it’s not really so hard!

Playing Autonomously

Combining the vision system with the robot’s movement system is the next challenge!

The robot’s micro-controller is part of a custom circuit-board developed specifically for the uArm and is therefore optimized for control of the robot. Without access to the input/output pins normally available on an Arduino microprocessor, the options for interfacing the vision system with the robot’s hardware are quite limited.

Thus, I haven’t yet been able to run both vision and movement from the single robot micro-controller. I have some ideas, though!

Conveying Emotion

If you have seem my STEM talk on Computer Engineering or the movement video above, you’ve seen that the robot is capable of expressing at least a few different emotions. I hope to build out this capability once the other issues are solved.

Final Update

Thanks to a comment on one of the YouTube videos, I realized today that it had been more than a year since I promised to update this page with progress. So here’s what happened.

Even if two halves work flawlessly, there will be unforeseen issues when they try to work together. When the only communication channel your onboard computer has is being used for a camera, it is impossible to debug a robot.

My approach was to rig a software serial port off of two unused uArm board pins strung to another ‘debug’ Arduino that would simply proxy data from the uArm to the computer via USB. Once robot debugging was complete, the external Arduino could be disconnected and the robot would run autonomously.

In the end, grounding problems between the Arduinos and glitchy Pixy performance due to its not getting enough juice off the uArm board were enough to ground the project.

I’m more a software guy. When it comes to low-level things like wire protocols and power systems, I want someone else to handle them. I had made each half work, and that was all I needed! 🙂

BattleDrones Video Game

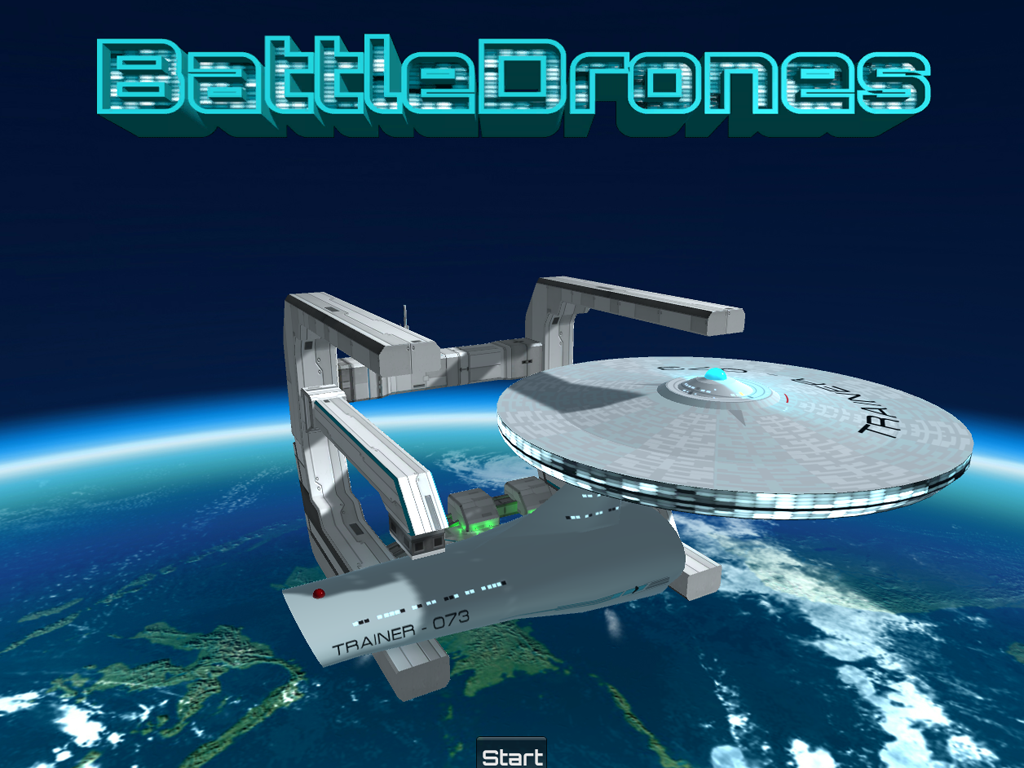
The BattleDrones title screen

The BattleDrones title screen

The ever-escalating war of billion-dollar video games has been a boon for independent developers. The two leading video game platforms, recently costing thousands of dollars apiece, are now free for anyone to use. Thanks again, Internet, we may yet forgive you for closing the bookstores!

Unreal and Unity, the two competing giants responsible for dozens of the most popular games, are fighting for the minds of developers. They figure (correctly) that the more developers familiar with their platform, the more likely the next winning game will come from their game technology. The “catch” is that you commit to pay them a cut of future revenue, but only if your game is commercially successful.

That meant that I could make a game and pay nothing.

Game Concept

Not too long ago, Markus “Notch” Persson, the creator of Minecraft, had a fantastic idea for a video game. In the now-defunct 0x10c concept, players would write computer code to control a spacecraft. Part of the game was that each player had the same number of computing cycles and therefore efficient coding itself was the core game mechanic.

It may seem odd for a game to be about programming, but these days many video games have a giant community of software developers players who write code to modify those games. Often these “mods” are so good that they become de-facto extensions to the game.

Notch’s concept was very grand, but I thought it would be pretty easy to do something like it on a small scale, as a proof-of-concept game demo.

In BattleDrones, the player has control of a computer-driven starship, a BattleDrone, that will carry our humanity’s fight against the evil alien invasion. A Drone operates only via the computer code that the player writes and must be programmed to sense danger and fight autonomously.

Getting Started with Unity

I really had no experience writing video games nor any familiarity with either Unity or Unreal. Luckily, for those who know nothing about something, there is YouTube.

I choose the Unity platform and dove into making some tutorial games to get an idea of how the engine worked. As you may have gathered from this blog, I learn a lot by making mistakes, so jumping right in and making those mistakes as quickly as possible is always a good approach for me.

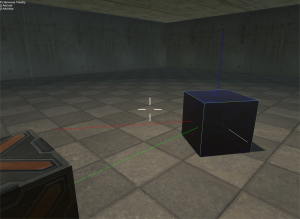
The first game concept I worked on with Unity, however, was a game called Fork that I started with a developer friend of mine. Fork’s mechanic was manipulating magnetized crates (in a space hangar) in order to progress in the game. While the concept was interesting and we learned a lot about Unity, we kind of hit a dead end and moved on to other projects.

When I began development of Fork, I expected that the there would be tools to, say, put a title here or put a magnet there. I figured one could make objects and add textures to them. You know, make a video game! It turns out that I was quite wrong about how that worked.

Developing a Video Game

While game development tools are very powerful, they are also very basic. If you want to make a cube, well you can do that right there in Unity! If you want a spaceship, however, you are building that in some other software package.

The simplicity of the game-development tools turned out to be more good than bad. One of the most powerful capabilities of a gaming platform lies in its ability to simulate rigid body physics. This allows a developer to basically set physics in motion and let the game engine handle the rest.

For example, a developer can assign mass to a truck model, put it on a road and spin the tires. The game engine then calculates everything from the friction of the wheels to the steepness of the terrain in order to determine how the truck will move over the road. Attach a joystick input to the front wheels and boom, you have a driving game.

Visualizing the algorithm for snapping magnetic boxes together

For the magnets in Fork, our work involved telling the game engine how much force a magnet would exert on a body at a given distance and Unity took care of dealing with mass, friction and the movement of the crates resulting from the combined magnetic forces.

Like Making a Movie

Developing a video game is surprisingly similar to making a movie.  Here’s a quick breakdown of some similarities.

Sets

A video game takes place in an environment that serves as the background to the scene. In BattleDrones, the set is the planet and space skybox that surrounds the player in three dimensions. I bought it for a few bucks from a marketplace where developers sell all kinds of game assets cheap.

Props

Painted drone model
Drone model with final paint scheme (but no lights)

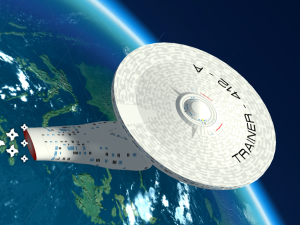
In a game, you’ll have objects in the scene that the player interacts with as part of the story. In BattleDrones, these are the spaceships that are controlled by the player or by the computer “enemy”. I created the ship model in Blender, the modeling package we used to create the sets and objects for Sector 42.

An early paint test
An early paint test

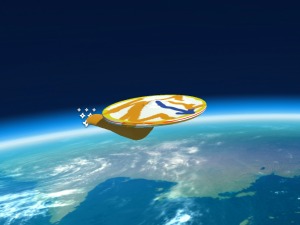
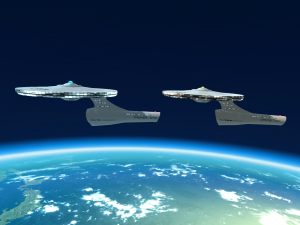
The ship then needed to be textured to give it a “painted” appearance. You can see that the game has two ship types that differ only by their paint job. Painting was done initially in Adobe Illustrator and then finalized in Photoshop.

The trainer/drone model with its two paint schemes


Lights

Lighting is almost as big of a deal as it is in film production. Video games use the very same lighting concepts that are used in photography. BattleDrones contains both set lighting of various types as well as decorative lights (“practicals”) that are visible in the scene.

Camera

Again, just like in film production, cameras have focal lengths and depth-of-field, in addition to a number of technical characteristics. In BattleDrones, the camera orients itself around the playfield but in Fork, the player object carries the camera so that you see what the player is pointing towards.

Action!

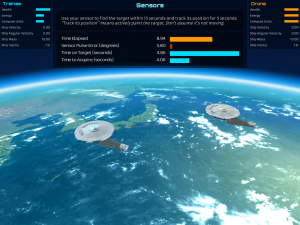
In video games, action is initiated by the player and is controlled by the game engine. In BattleDrones, the player’s computer code is interpreted by the game engine and “acted out” by the player’s ship. Because of the Unity physics engine, I only had to apply the appropriate force (when the engine was firing, for example) to move the ship.

scan_simulation2
A running game screen with the user-interface overlaid

Sound

Many of the same audio concepts and tools are used to create and mix video game sounds as are used in film and video. Most of the work is in finding or making sounds that fit the game. The BattleDrone sounds were all sourced from FreeSound.org, a website where people share captured sounds for free. Need a tea kettle whistle to make a steam-like thruster sound? A jet engine to use for your spaceship ? You will find them all there.

Titles

levels interface
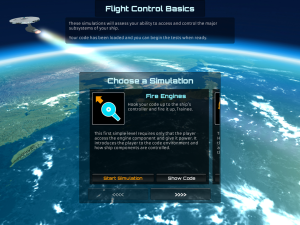
The interface for choosing the training scenario

I’ll cheat a bit here and lump the graphical user interface (GUI) in with titles. The GUI is separate from the physics simulation taking place in the scene and provides the buttons, menus and information outputs that the player sees on the screen.

Play The BattleDrones Demo

Because this is a demo, I’m showing you what I think will be most interesting. In the demo, the code has already been written by the player and you get to just see what happens when the spaceship runs the player’s code.

I see that this has turned into another long post, but I hope you enjoyed a peek into making a video game. You can try out BattleDrones on Windows, Mac or Linux by visiting the link below and clicking the link for your operating system. Once you’ve downloaded zipfile, simply unzip. (There is no install.)

Download BattleDrones!

Molokai Honey

It was summer in Hawaii and we decided that the family would move to the island of Molokai to raise bees and harvest honey as a family business.

Or, at least that’s what we told the kids right before we put them in front of the camera.

We hope you like our bee movie! The mockumentary style covers up a lot of our errors, and we threw in a few intentional goof-ups along the way. The result, we hope, is a comedy.

Molokai Vacation Location

I never make ideas, I only find ideas. It’s true that we did have a few bees in the pool on our summer vacation and it was my wife Cindy came up with idea of a family honey business mockumentary.

Being on vacation and considering the slower “Molokai time” of the small island, I enthusiastically jumped on board, interviewing the kids before they could figure out what was going on.

I shot the main interview footage one afternoon on our Molokai vacation using only a handheld iPhone 5 with available light. There was really no script or plan for the story at that point, so I chose some provocative questions and hoped for the best.

The Kaneshiro family and Molokai Meli were real, of course, and we did find them only after we began filming — on the Intenet. They were very gracious for not only letting me interview them, but also in sending me a few dozen still images of bees and their hives. While in Hawaii, I also tracked down the producer of a local documentary who was kind enough to let me use his secondary bee footage that you see in the cutaways.

Story Development

Back in Virginia, I picked through all the vacation footage and started piecing it together into a kind of narrative.

I had begun to build a story around the best of the kids’ reactions, but it was a bit flat and disjoint. The kids’ answer to the various interview questions were pretty good, but the story needed some kind of structure to tie it together.

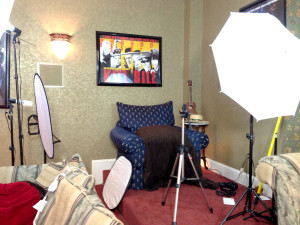
Basement Set
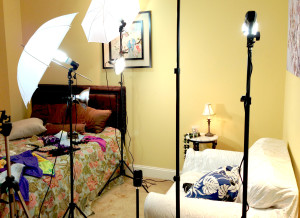
Dad’s set, Basement Studios Inc.

Rather than using a narrative voice-over, I wanted the film to be of the style where the interviewees tell their entire story, prompted only occasionally by the interviewer. While Mason, Cassie and Maddie were completely unscripted in Hawaii, I had some direction in mind when I filmed Cindy that fall back in Virginia.

Hailey's Set
Hailey’s Room set, courtesy: Guest Room

The Virginia shoots were much later in the season and we were lucky to capture Cindy’s video outside before the weather turned gray and we would have to use interiors and need good lighting. That winter, Hailey and I wrote scripted scenes for the two of us around indoor settings and created some sets that would round out the story.

Post Production

The most fun on this project was getting to learn a number of new production techniques. Here’s a brief overview of some of the things we did.

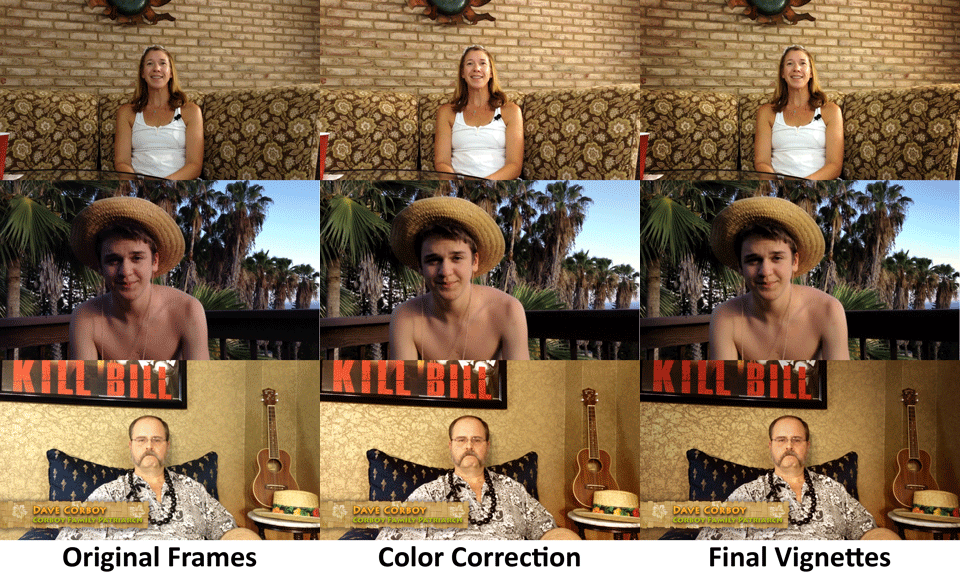
Color Correction

Primary color correction is the work to adjust all of the visual assets (footage and stills) so that they have the proper white & black levels as well as good, balanced color. Despite my efforts to set exposure and white-balance in Hawaii, I found that not only did light levels and color shift between interview locations — but sometimes even between questions with the same subject in the same location! We learned how to correct for this as best we could to make the shots look similar.

I also found that some subjects would blend into the background too much, tempting the viewer’s eyes to wander around and lose their attention to the scene. For these, I created vignettes by subtly dimming the edges of the shot in order to highlight the subject.

Image Color Progression
Color correction progression

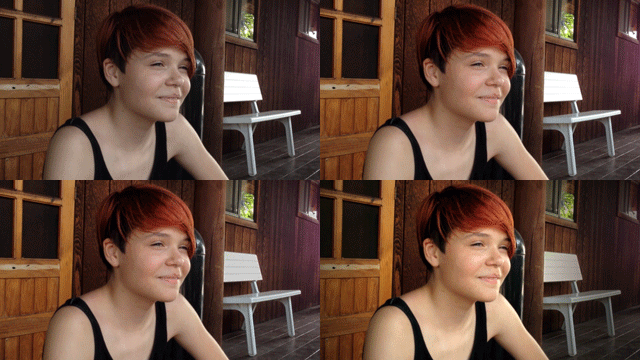
We also did some secondary color correction to tone-down bright or distracting things in the background and, at the end of it all, added the overall color grading that gives the film the brownish Molokai cast.

Cassie color correction
Cassie with secondary correction for the bright white bench
Image Stabilization

Because I had shot the Molokai interviews using a handheld camera, the shots looked pretty awful bouncing around as I posed my questions. I used some video tools to stabilize these shots, giving the look of the camera mounted on a tri-pod. The ravine pan shot is a great example of what was originally a very shaky handheld video. If you want to see how the raw interview frames looked before stabilization, take a look at the post-credits clip of Mason.

Sound
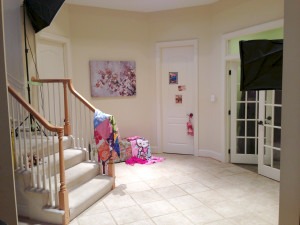
Hallway Set
The hall outside Hailey’s room, dressed with Hawaiiana

There was a lot of sound work. While the Molokai location sound was captured in-camera, all the “studio” sound was recorded separately from the video using lav and shotgun mics that were synced or mixed during the editing process.  All of the off-camera voices, including Hailey’s behind the door, were recorded separately and mixed in later.

While about half of the bird sounds are real, the other half were added from unused Molokai footage to expand the sound field. I even did a small amount of foley for the sound of my slippers as I follow Hailey into “her room,” which was actually our basement gym.

All sound clips at a minimum had to be converted to mono, cleaned of noise and compressed in dynamic range. Even before music was added, the audio project  consisted of over 100  clips in 12 tracks of audio.

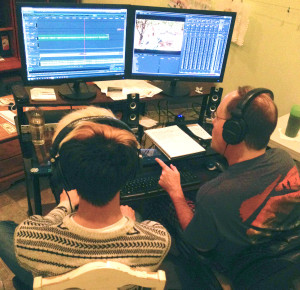
Audio mixing with Joe Ross
Finalizing the audio track with Joe Ross

Joe Ross, the re-recording mixer, did an incredible job tweaking every audio clip and blending the tracks together into the final mix. I thought I had done a pretty good job with the rough tracks and was amazed at how much he was able to improve the overall composition.

Music

Music rights are a funny thing. There are many many things you can get away with on YouTube, but using other people’s music is not one of them. I found out how good YouTube is handling music rights when I first uploaded Sector 42 — The Space Movie. Within 30 seconds of uploading, YouTube had computationally identified some of the music as having had a rights claim against it.  I did have a license from the music publisher and so I had to work with them directly to confirm this to YouTube before the video was released.

Finding and licensing  Hawaiian music for this project proved much more difficult. After many hours on the Internet dealing with inflexible licensing companies wanting hundreds of dollars per song, I finally found Music2Hues. They had some great original Hawaiian music and were kind enough to license me everything I needed for a fraction of the cost of just one of the more traditional tracks.

Goof-ups

We learned that a simple iPhone can capture some astoundingly good high-definition footage. We also learned that when the older iPhone 5 is coerced (via FiLMiC Pro) to capture raw frames of video in the hot sun, it will overheat and completely lose it’s audio sync. Also, bring a tri-pod.

I completely screwed up Hailey’s shoot by recording the entire thing at 30fps, rather than the film rate of 24fps we were using. This turned out to be an almost unsolvable problem for reasons I didn’t initially understand and fixing it was an interesting but longer story that I’d love to tell another time.

I also learned that if parts of your image are so bright that they exceed the camera’s ability to record them properly, they cannot be fixed in post-production. This ruined some additional pool and bee shots I would have liked to include. Some of Mason’s shots couldn’t be properly light-leveled and appear much too bright as a result. A simple bed sheet to diffuse the sunlight would have fixed this.

We removed dozens of squeaks, hums, and car sounds to make the locations sound more pristine. We shut off furnaces and refrigerators back in Virginia to get cleaner sound. We used blankets and pillows to make a recording studio and learned that it’s virtually impossible to get rid of location wind noise that spans the vocal range.

Lower-Third Caption
Lower-third caption graphic

We removed fingers that obscured the camera lens, re-framed shots, restored “lost” audio and, in general, experienced all the newbie mistakes in making a movie.  Along the way, we also made graphics and titles and managed to meet a lot of interesting people.

All in all, another great family project!

3D Printing A Spaceship

The Artemis transitions from virtual to physical

Today at work, I printed a spaceship!

One of the best things about my job is that I’m surrounded by tremendously smart engineers that fully appreciate the benefits of geeking out. Over the history of our small start-up, my colleagues have brought all manner of their creations into the office including home-built telepresence robots, processor-controlled Christmas decorations and a homemade quad-copter drone that was so good that it was able to crash into a tree way over on the far side of the parking lot.

But this week, we were the kings of Nerdville when Steve brought his new 3D printer in for all of us to play with.

Continue reading 3D Printing A Spaceship

Motion Graphics – thejbo goes to Florida

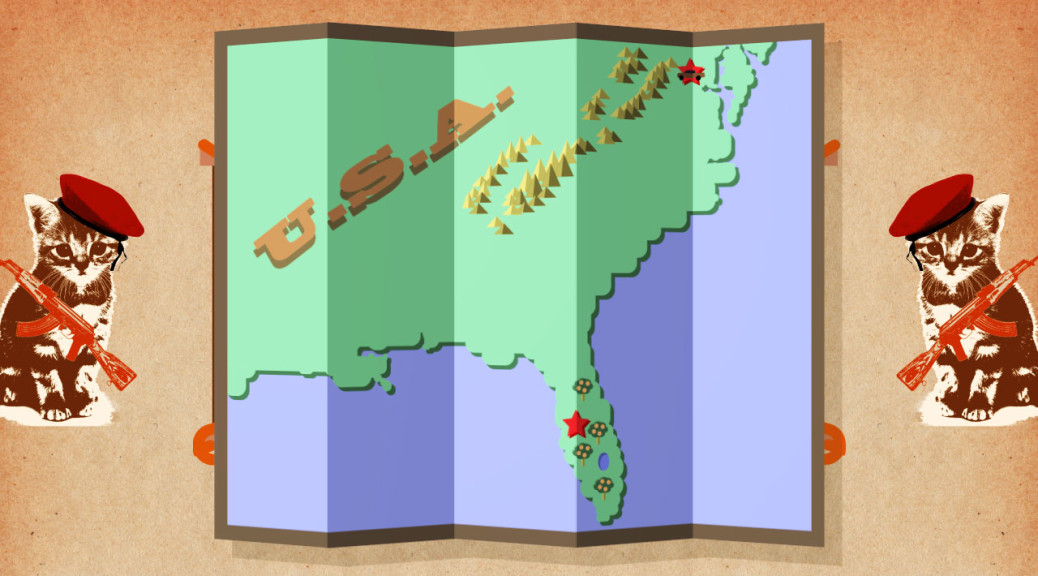
My friend at work, who goes by “thejbo”, is the guy who builds and maintains all the servers that host our company web application. He’s moving to Florida to work remotely and I made this motion graphic to commemorate his leaving the office. Really though, it was an excuse to learn more about After Effects and to work with my daughter Hailey. We had a great time making it!

Continue reading Motion Graphics – thejbo goes to Florida